
IPFS 指纹 这是什么
VestaCP安裝,免費開源的網站管理工具
PS: Vesta 目前已經停止維護有許多漏洞尚未更新,建議安裝分支產品Hestia
這陣子開始將伺服器從虛擬空間轉移到VPS上,同時也在尋找網站管理工具。
同時評估了習慣的 cPanel、開源的 VestaCP和對岸開發的 宝塔面板,經過整體評估和社群支援度決定使用CentOS搭配VestaCP作為網站管理工具。
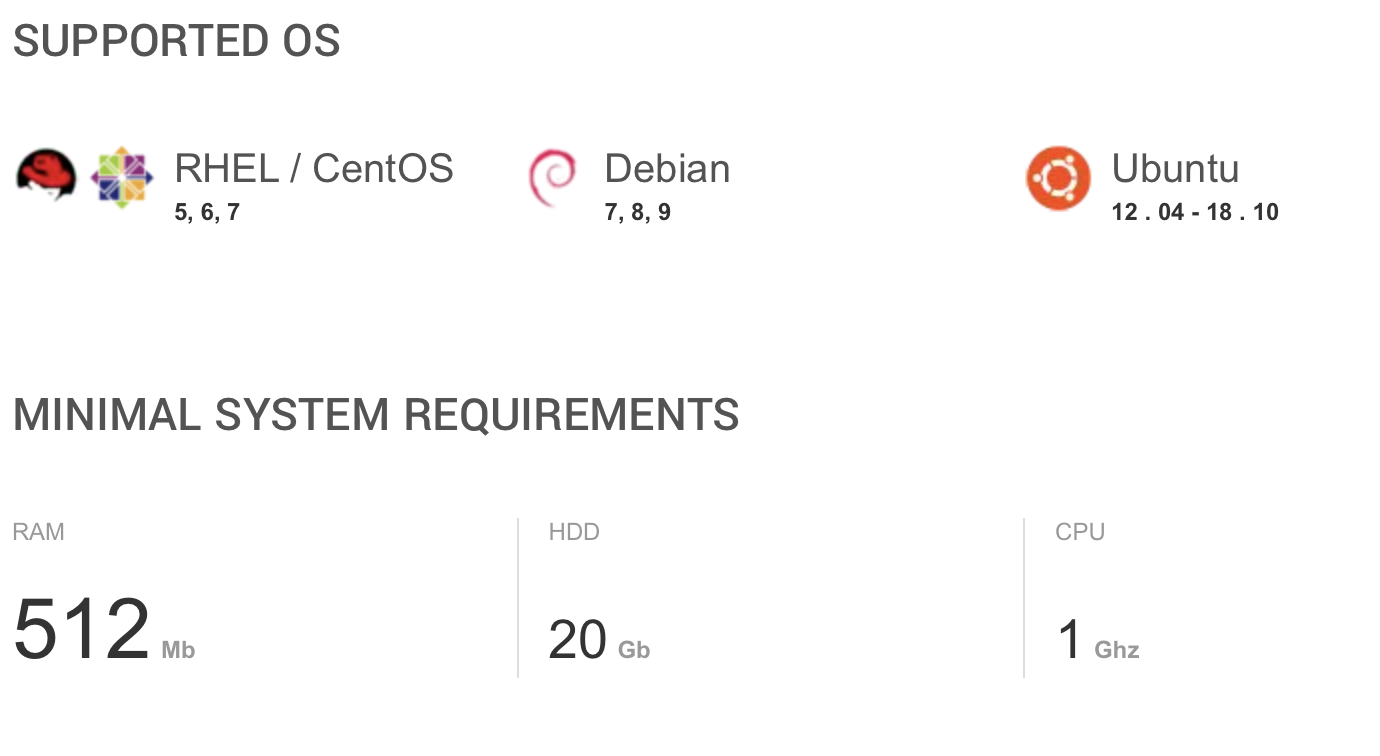
在安裝前請先注意Linux版本、CPU、記憶體和硬碟空間是否符合要求
https://vestacp.com/install/
VestaCP 有貼心提供多樣組合進行安裝,挑選完後會自動產生出執行指令
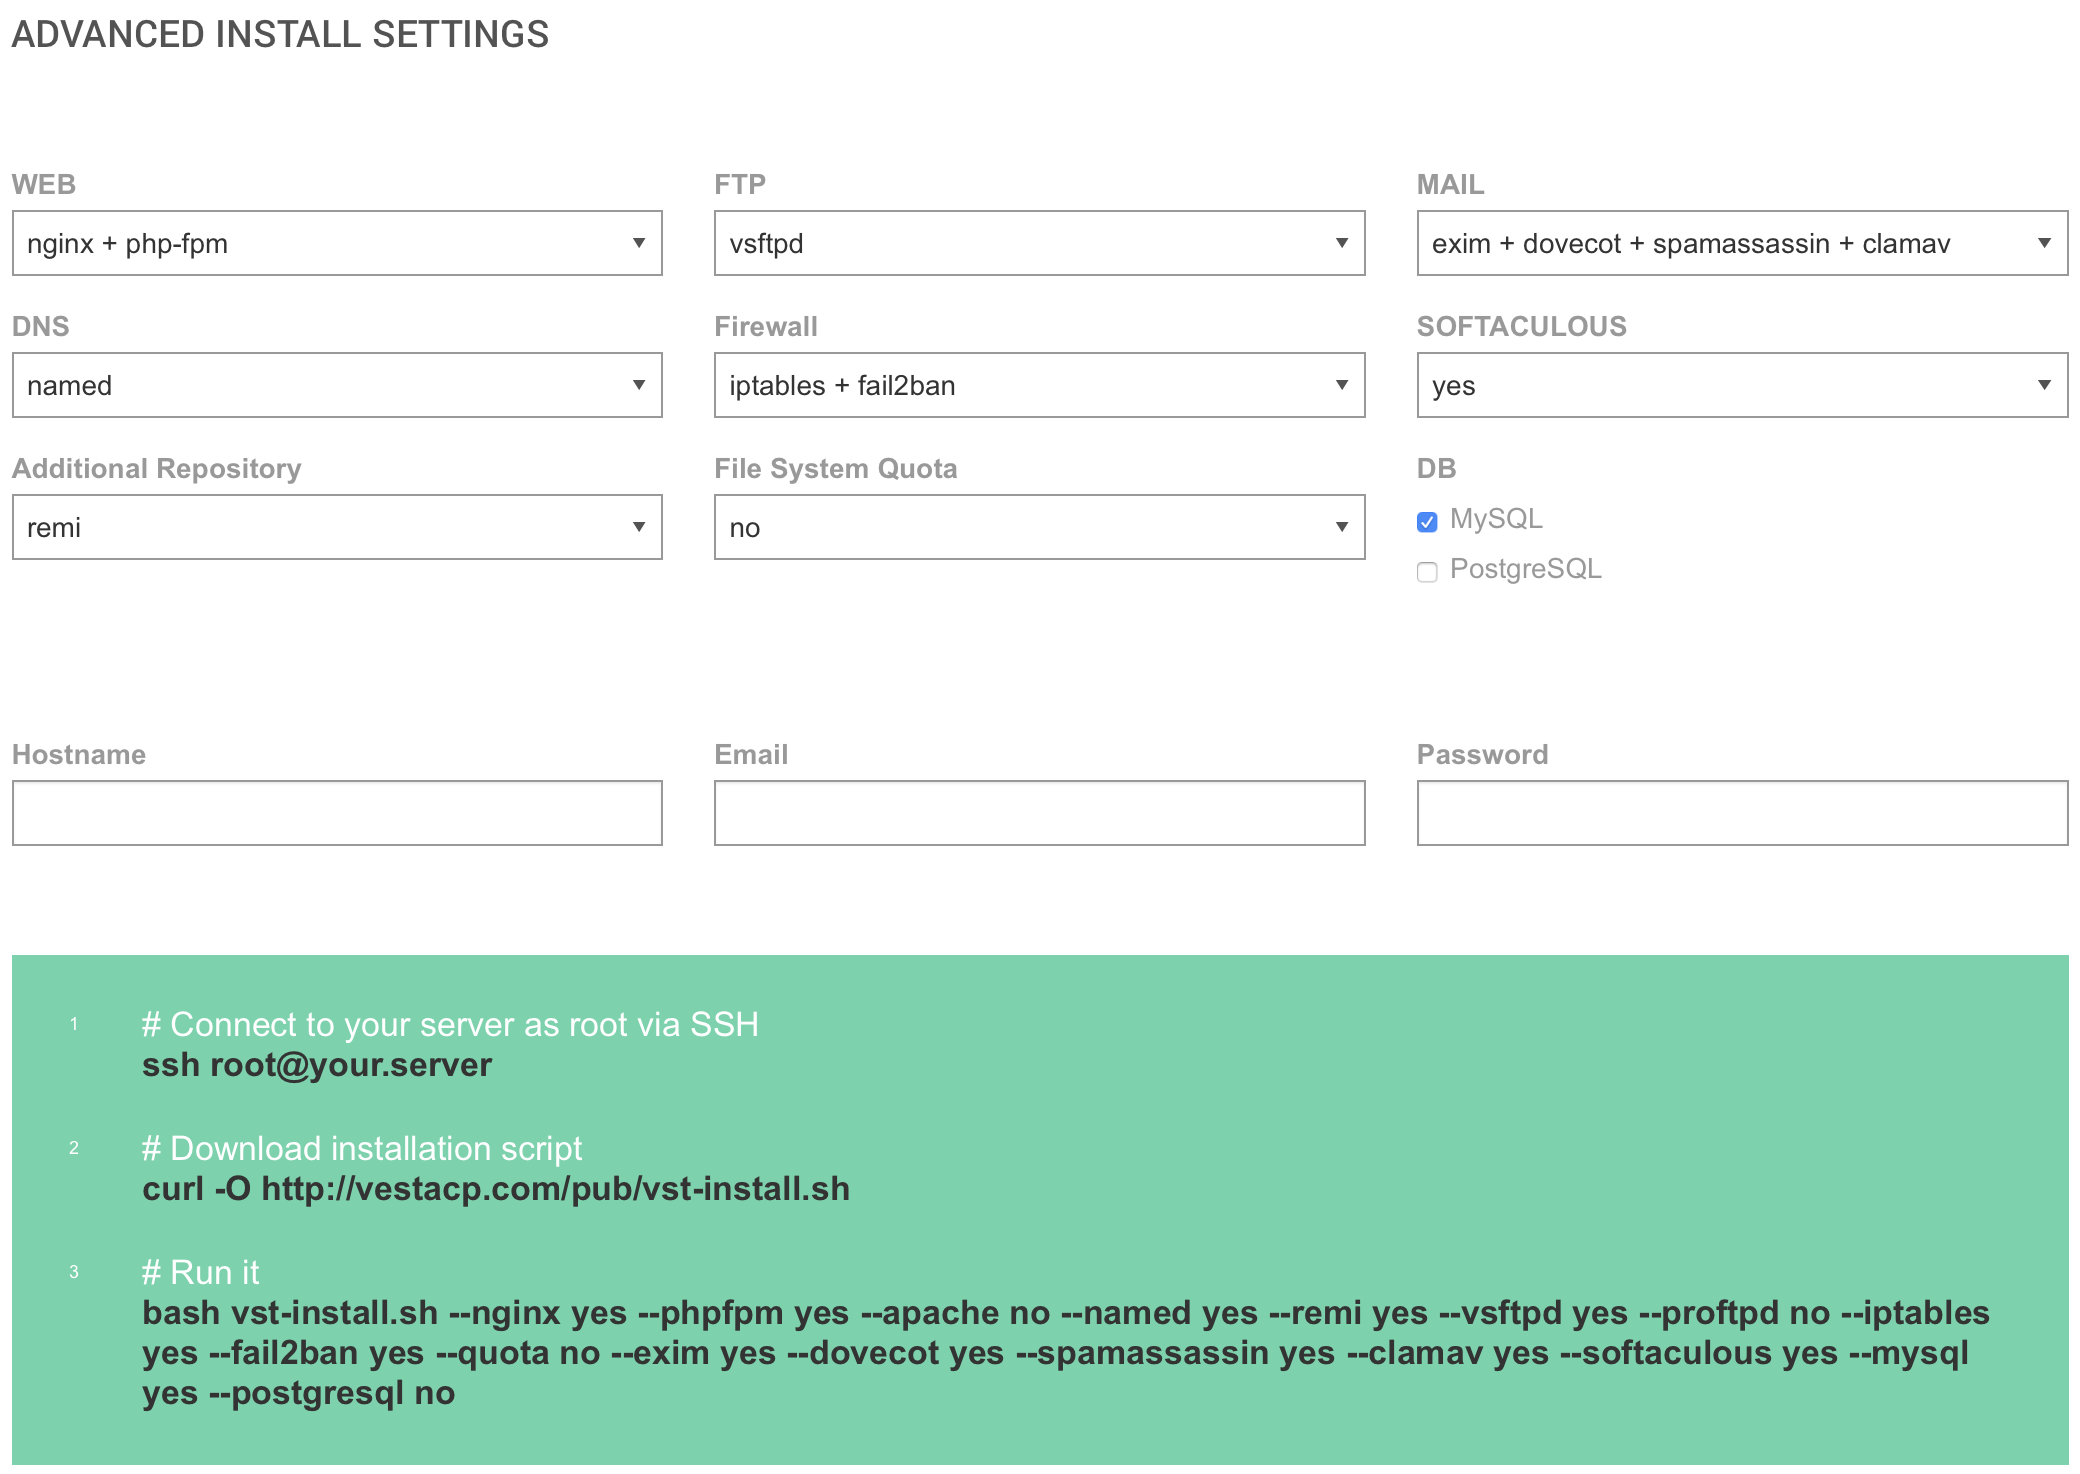
接下來就進入安裝流程,首先先安裝腳本
curl -O http://vestacp.com/pub/vst-install.sh接下來將剛剛產生出的指令貼上執行,這邊是我使用的安裝指令
bash vst-install.sh --nginx yes --phpfpm yes --apache no --named yes --remi yes --vsftpd yes --proftpd no --iptables no --fail2ban yes --quota no --exim yes --dovecot yes --spamassassin no --clamav no --softaculous no --mysql yes --postgresql no安裝過程中有一個地方要輸入 FQDN 的,請輸入您的網址
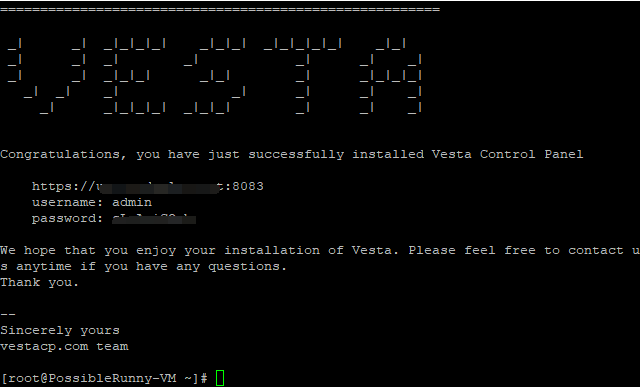
最後完成時,輸入您的網址加上 :8083 即可到達管理後台
原文連結清晨小農夫