[Cloudflare][WordPress]Cloudflare的更進階防護 - Zero Trust
在之前的文章中我透過了Cloudflare的WAF規則設置了幾個措施減少不必要的騷擾(直接被Cloudflare擋下),但對於登入頁面來講之前的規則似乎又有點嚴苛(如登入頁面或是admin-ajax.php等服務限定IP才能登入)
有興趣的人可以翻翻之前的文章,而這篇文章是進一步做了調整,針對/wp-admin以及/wp-login.php這兩個都是登入頁面作進一步的防護(防止沒必要的人登入)
透過Cloudflare的規則設定達成網站防護
鑑於之前的防護篇,我這裡寫更新版的規則部份(更進階,但其實也是靠AI互相對照就是)
這裡還是會稍微講解WAF的設置(大略提示)
前置作業(必要)
這邊還是要嘮叨一番,如果DNS設定沒有源IP達成「透過Proxy處理」狀態的話,這些功能都沒辦法用
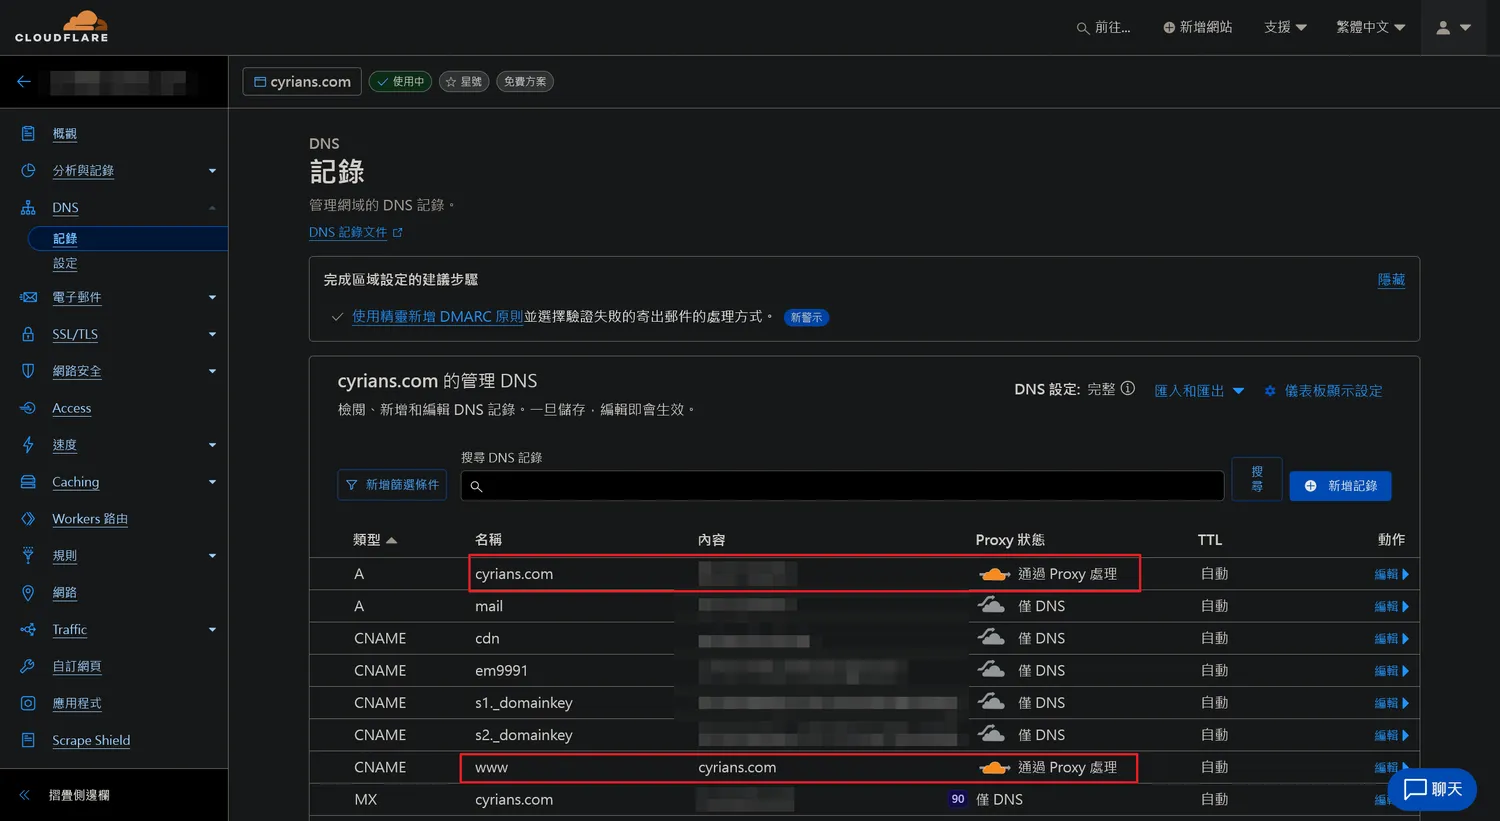
務必確認網站的A記錄是「透過Proxy處理」狀態
WAF規則設置手續

域名的首頁點選「網路安全」
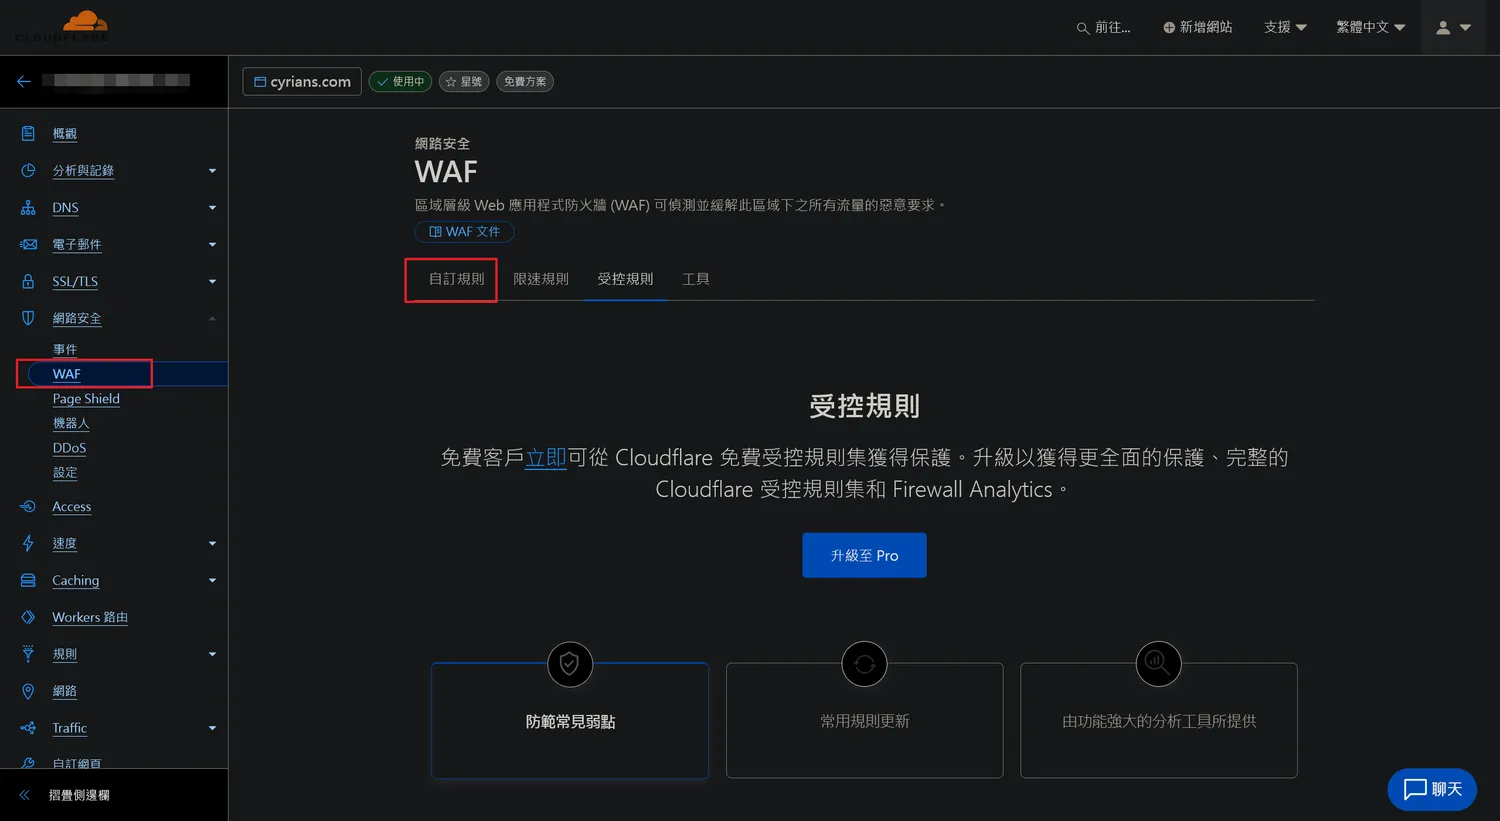
點選「WAF」後再去找「自訂規則」的分頁
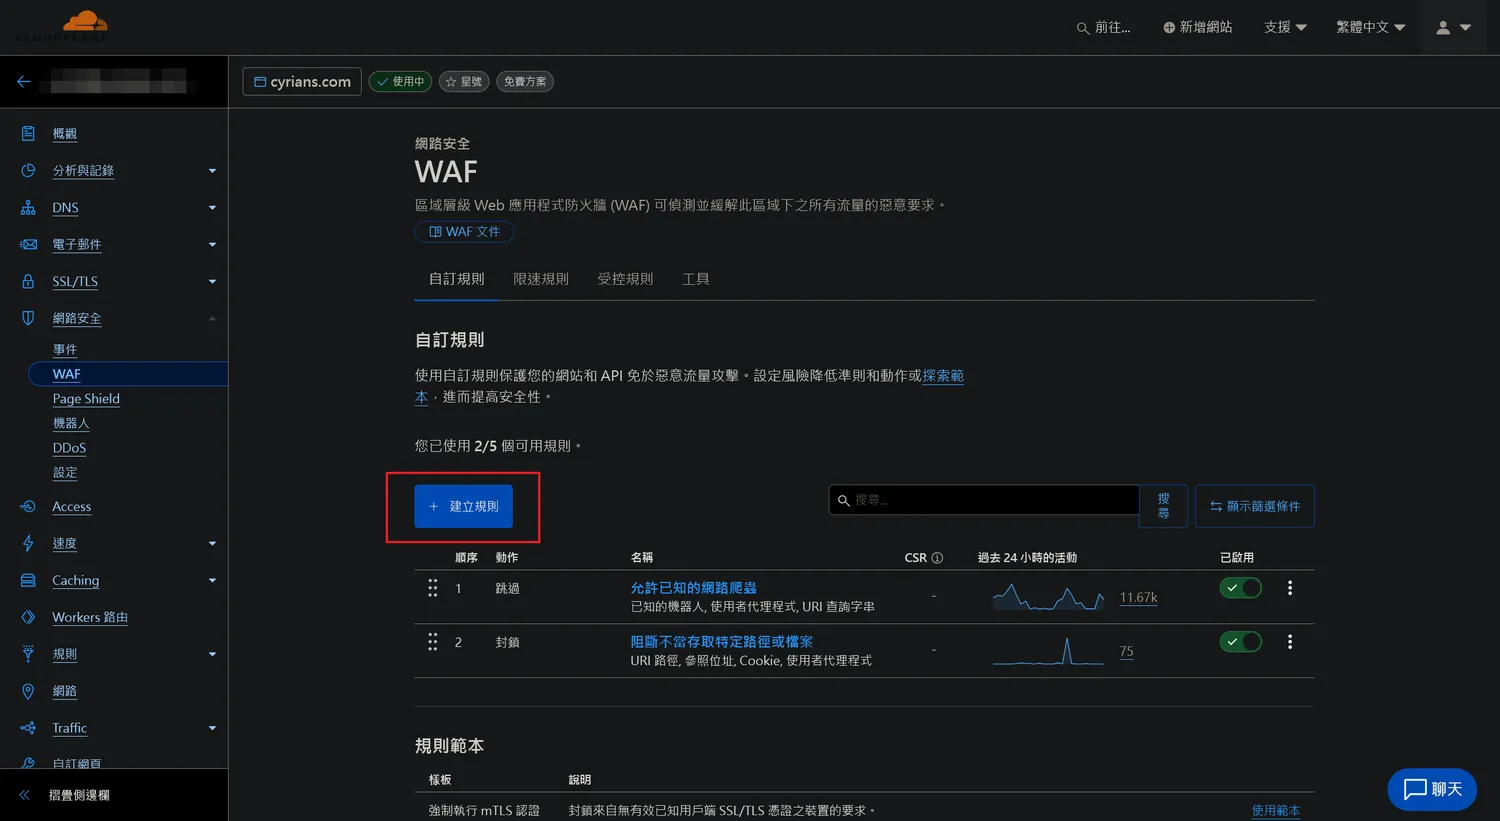
點選「+建立規則」按鈕
WAF自訂規則篇
防止未知的BOT來爬網站
我這裡就不多做解釋,直接以運算式預覽結果表示
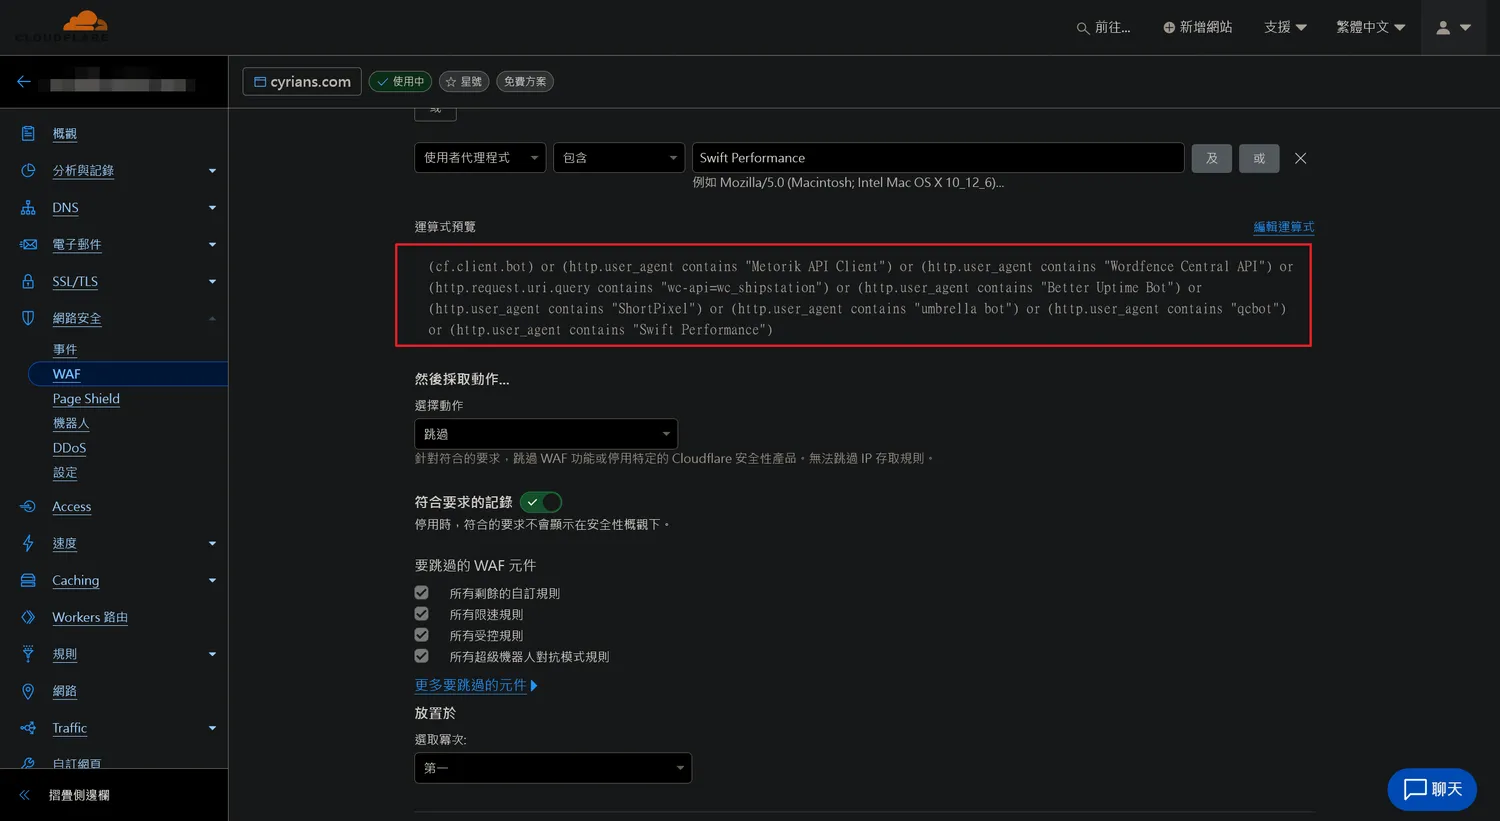
允許爬蟲的規則
以下為我個人的規則參考(可以直接複製然後用編輯運算式的方式直接貼上)
(cf.client.bot) or (http.user_agent contains "Metorik API Client") or (http.user_agent contains "Wordfence Central API") or (http.request.uri.query contains "wc-api=wc_shipstation") or (http.user_agent contains "Better Uptime Bot") or (http.user_agent contains "ShortPixel") or (http.user_agent contains "umbrella bot") or (http.user_agent contains "qcbot") or (http.user_agent contains "Swift Performance")簡易說明:
Cloudflare所認知較常見的BOT和列出來的其他特殊BOT流量進來時,便可以通過這個規則;如果是未知的爬蟲則會被攔截下來
阻斷不當存取特定路徑或檔案
第一道線是防止未知的爬蟲進來,接著第二條線則是防止對特定資料夾或是檔案訪問的不速之客
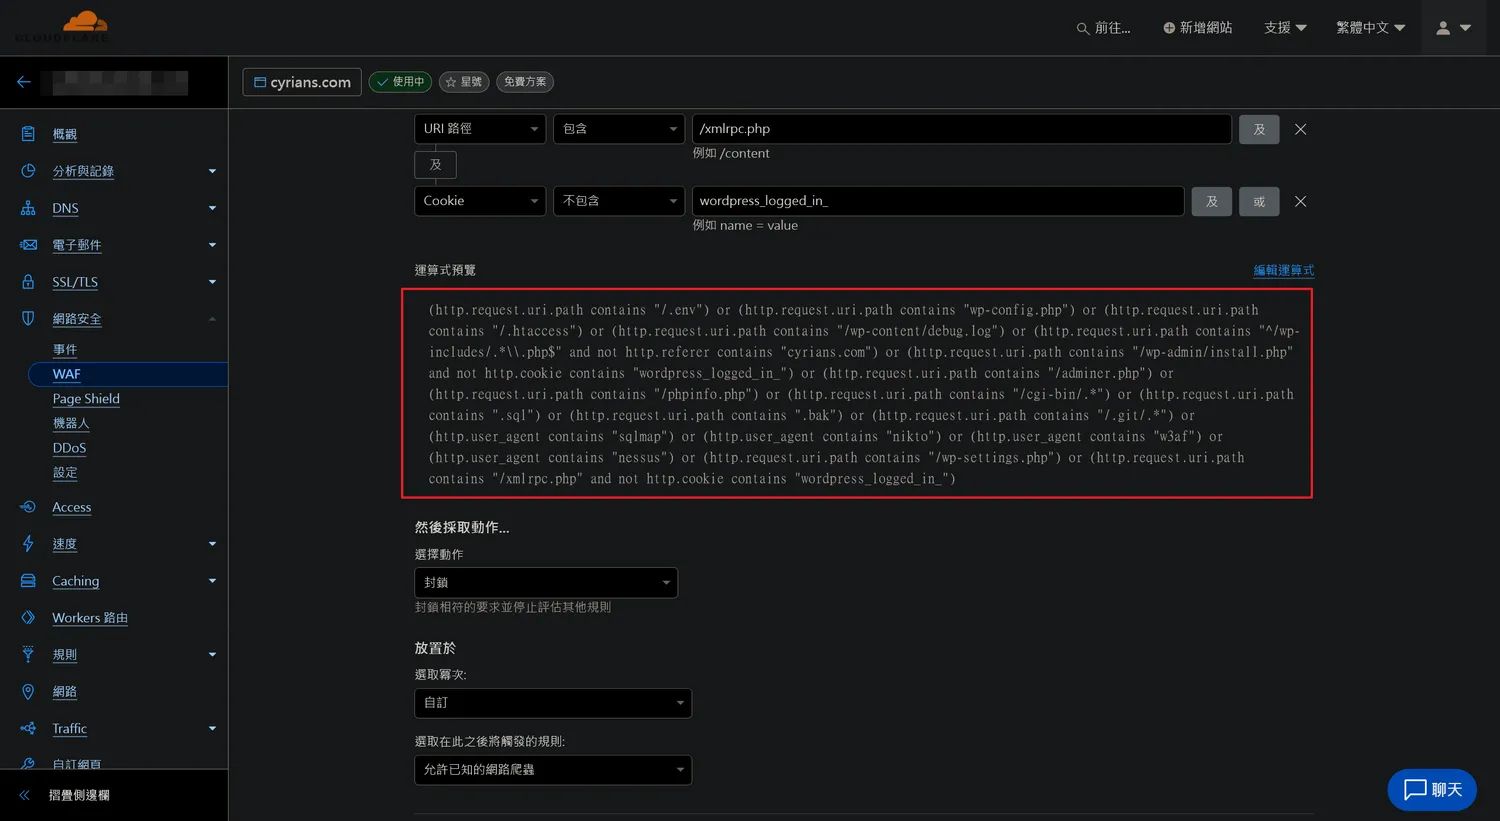
封鎖不必要或是未經許可的訪問
同樣以下為我的寫法供參考
(http.request.uri.path contains "/.env") or (http.request.uri.path contains "wp-config.php") or (http.request.uri.path contains "/.htaccess") or (http.request.uri.path contains "/wp-content/debug.log") or (http.request.uri.path contains "^/wp-includes/.*\\.php$" and not http.referer contains "cyrians.com") or (http.request.uri.path contains "/wp-admin/install.php" and not http.cookie contains "wordpress_logged_in_") or (http.request.uri.path contains "/adminer.php") or (http.request.uri.path contains "/phpinfo.php") or (http.request.uri.path contains "/cgi-bin/.*") or (http.request.uri.path contains ".sql") or (http.request.uri.path contains ".bak") or (http.request.uri.path contains "/.git/.*") or (http.user_agent contains "sqlmap") or (http.user_agent contains "nikto") or (http.user_agent contains "w3af") or (http.user_agent contains "nessus") or (http.request.uri.path contains "/wp-settings.php") or (http.request.uri.path contains "/xmlrpc.php" and not http.cookie contains "wordpress_logged_in_")以上為放行以及封鎖的規則
WAF限速規則篇
我們在使用WordPress的時候,還是有些服務我們會用的到,但用上面的規則似乎又會有點太嚴苛,那麼這時候就可以採用WAF的限速規則(算是減緩那些短時間大量訪問特定檔案的攻擊)
只是因為我的Cloudflare是免費版本,所以WAF限速規則僅只能一條且有相當的限制性(付費版應該可以詳細設定的部分會更多)
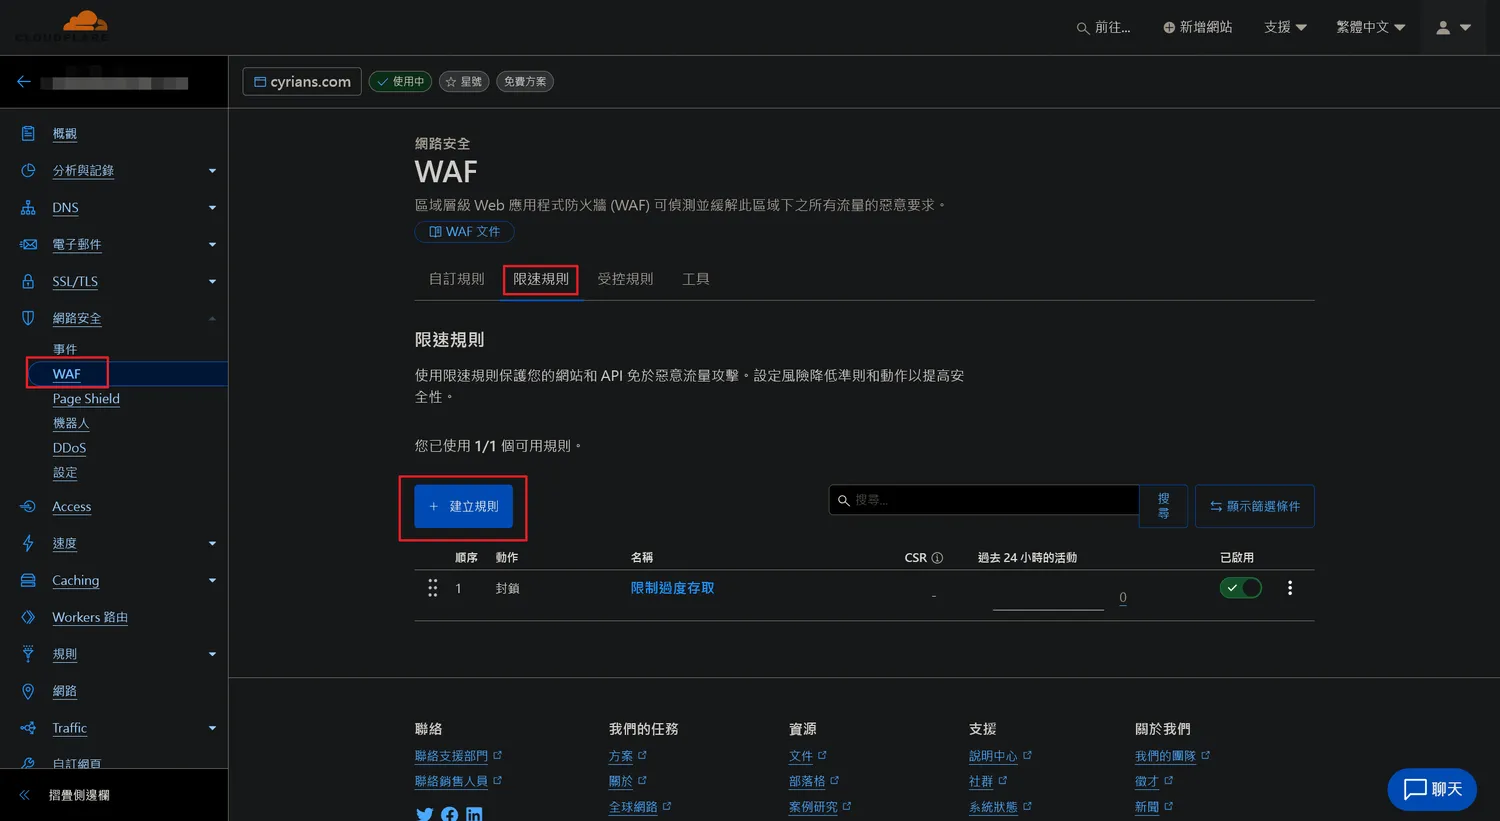
在WAF頁面選擇「限速規則」分頁後按下「+建立規則」按鈕
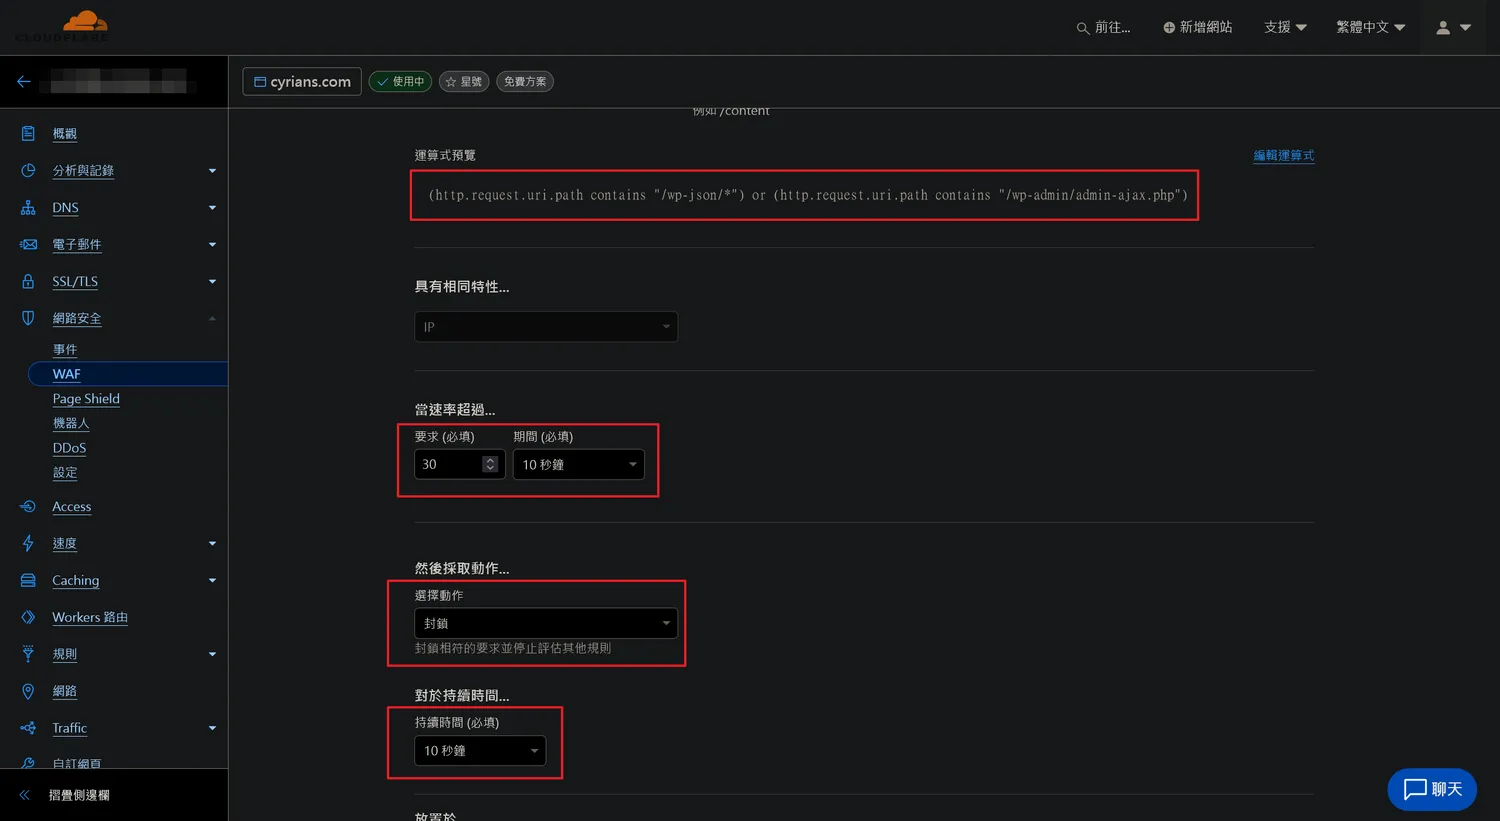
這裡只有當速率超過…的「要求(必須)」可以輸入數值,其他沒有選項可以選擇;我這裡輸入值為「30」
由於/wp-json/*(WordPress REST API)和admin-ajax.php會時不時用到,所以我這邊的規則是
(http.request.uri.path contains "/wp-json/*") or (http.request.uri.path contains "/wp-admin/admin-ajax.php")對於1個IP速度做了10秒內持續要求30次,這會判定為異常而封鎖
正常來講,一個IP在一分內要求100次的處理已經相當的多,這已經多達一分鐘180次要求,可以認定為惡意訪問了
以上為限速規則的部份
登入頁面的防護
關於WordPress的登入頁面,基本上為wp-login.php和wp-admin這個路徑,所以只要針對這兩個路徑設定好由Cloudflare把關動作即可,這時候我們可以靠Cloudflare的Zero Trust功能來達成
※很抱歉前面Zero Trust設定的部分似乎一次就設定完,沒辦法再走一次,這地方建議走一遍看看,接下來的文章就先以設定好Zero Trust搭配設定來保護進入登入的頁面
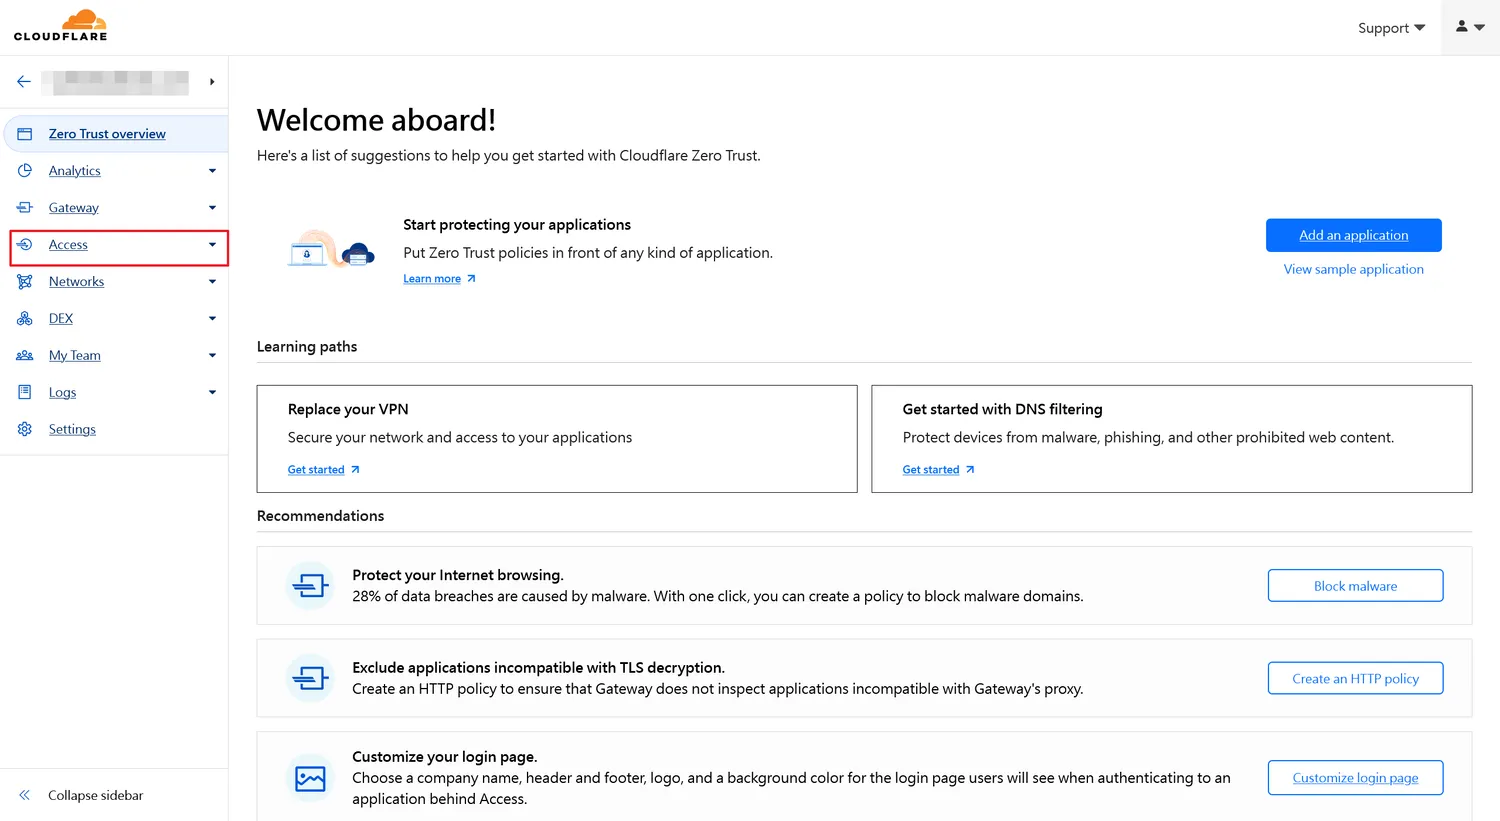
進入Zero Trust的介面後,選擇左側的Access選項
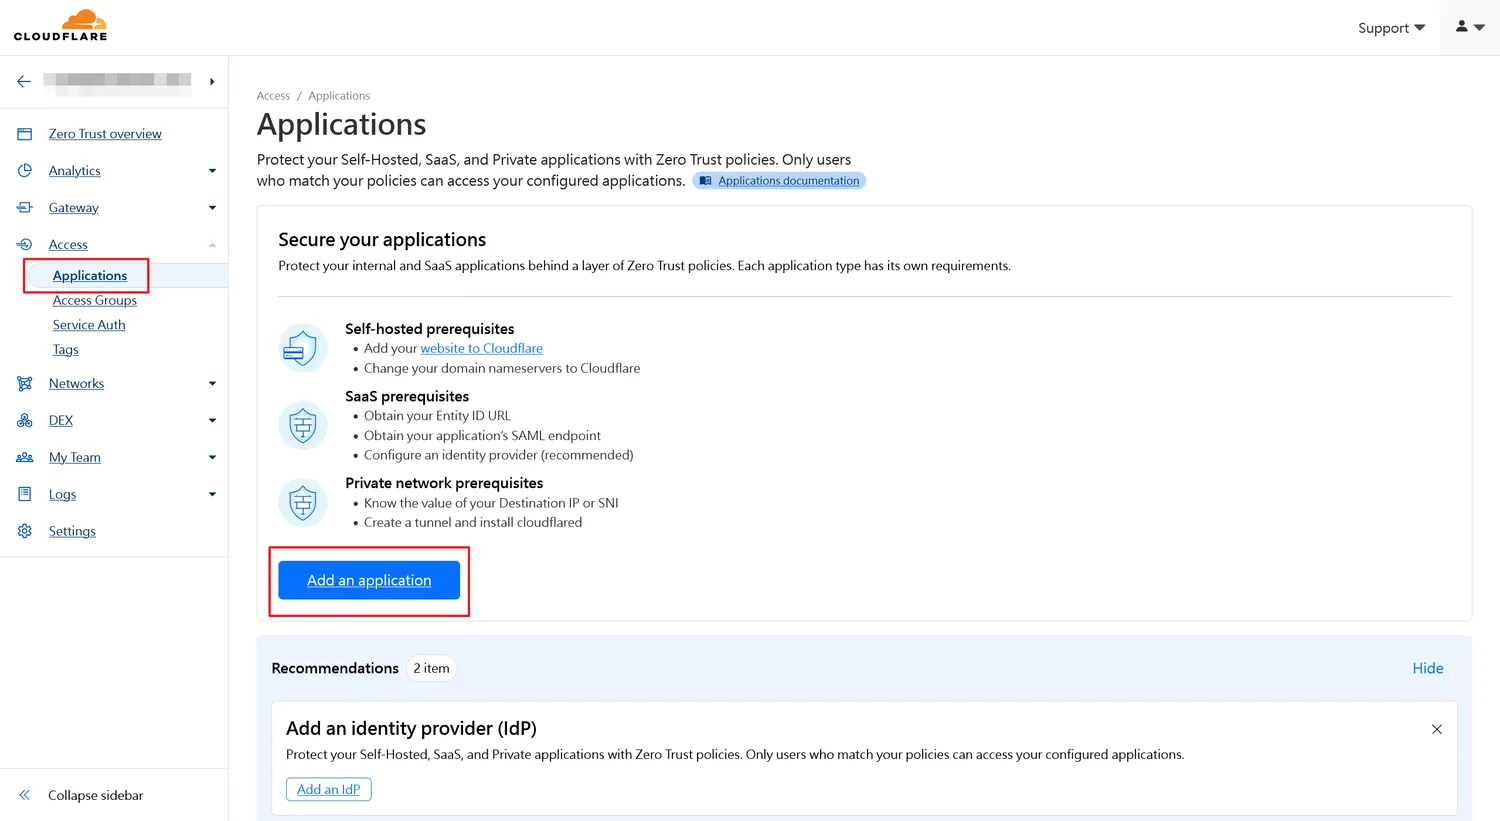
「Applications」選項裡,點選「Add an application」按鈕
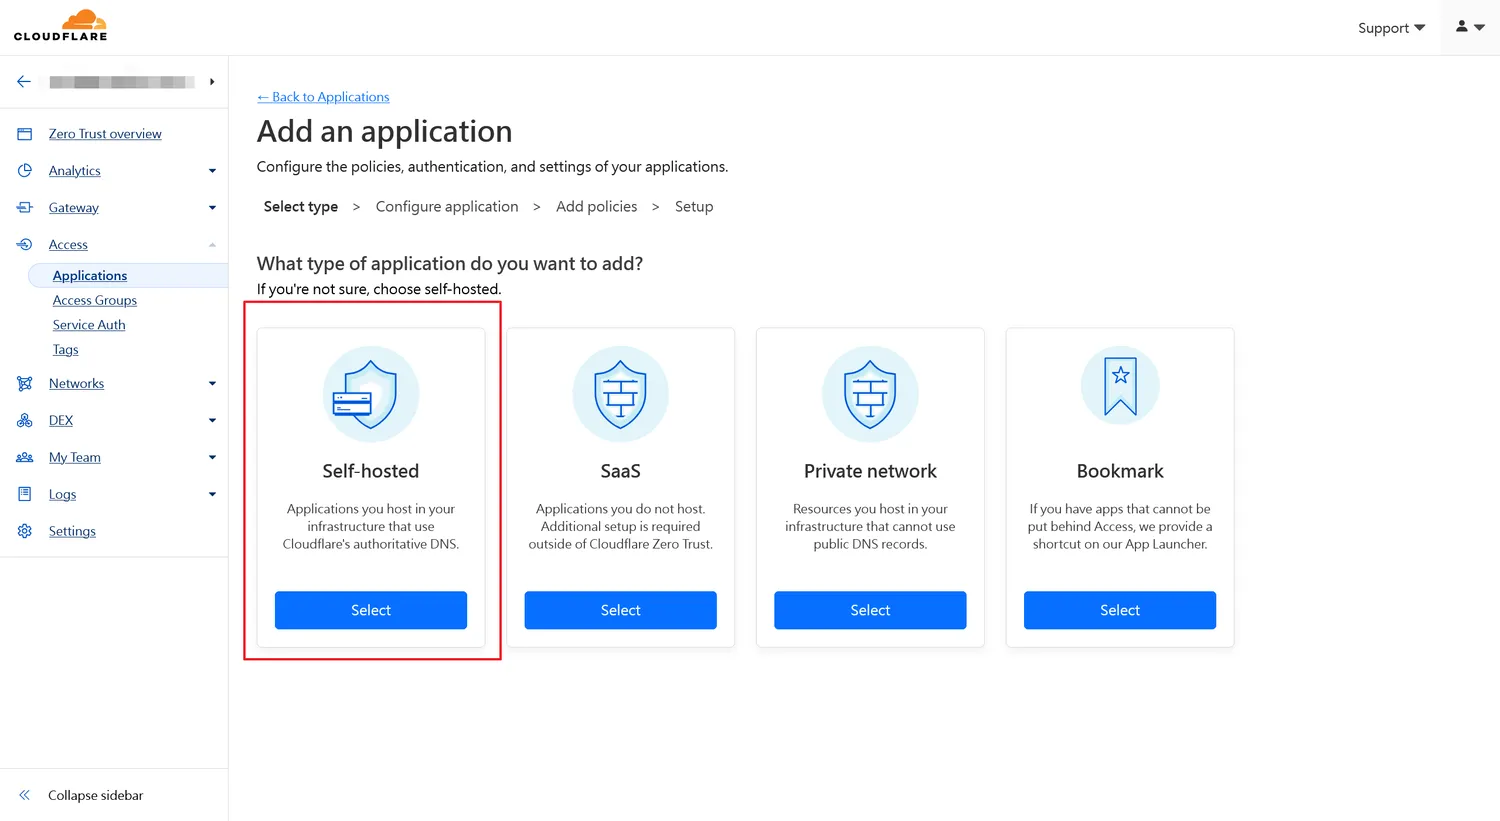
選擇「Self-hosted」選項
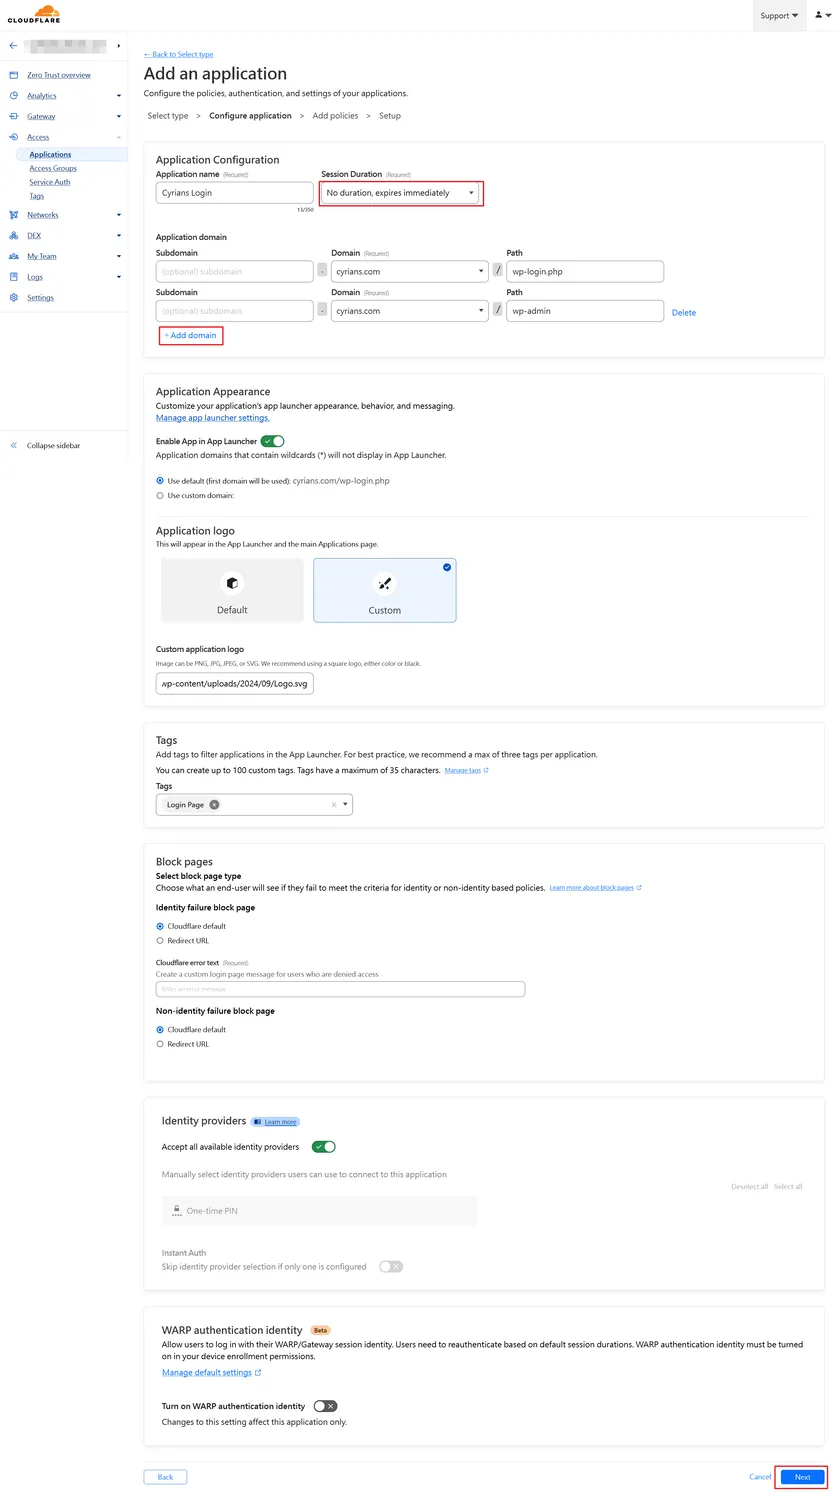
「Session Duration」的部分可以選擇「1 month」,否則每次要進入後台都要重新認證
其他像是Application domain的地方,Path內容分別填入wp-login.php和wp-admin(可以用下方的+Add Domain增加),填完後基本一路往下按下「Next」按鈕

同樣「Session Duration」的部分選擇「1 month」
Include項目,Selector選擇「Emails」,Value則是填入信箱(可以多個信箱配置,以因應多名人員登入),同樣設定好就往下按下「Next」按鈕
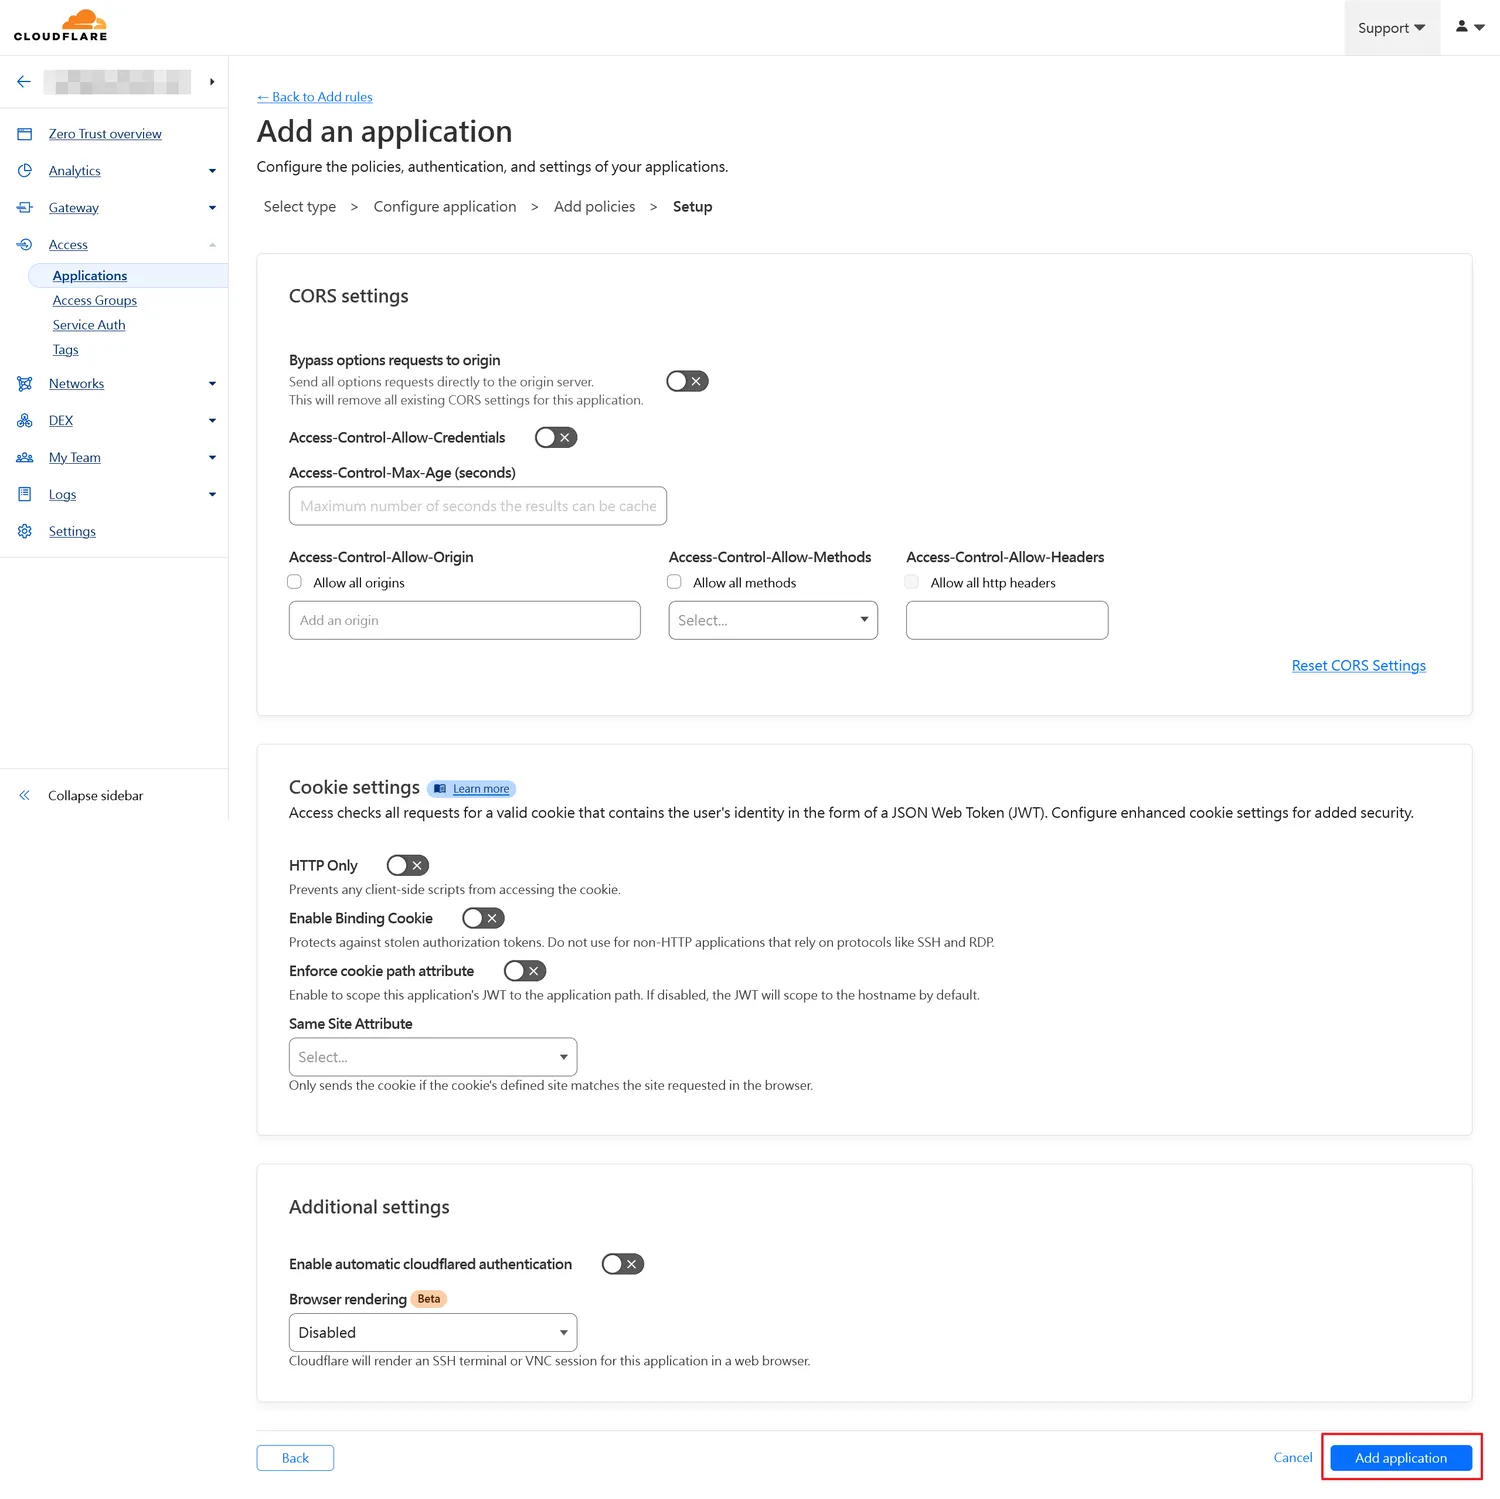
一路往下然後按下「Add application」按鈕
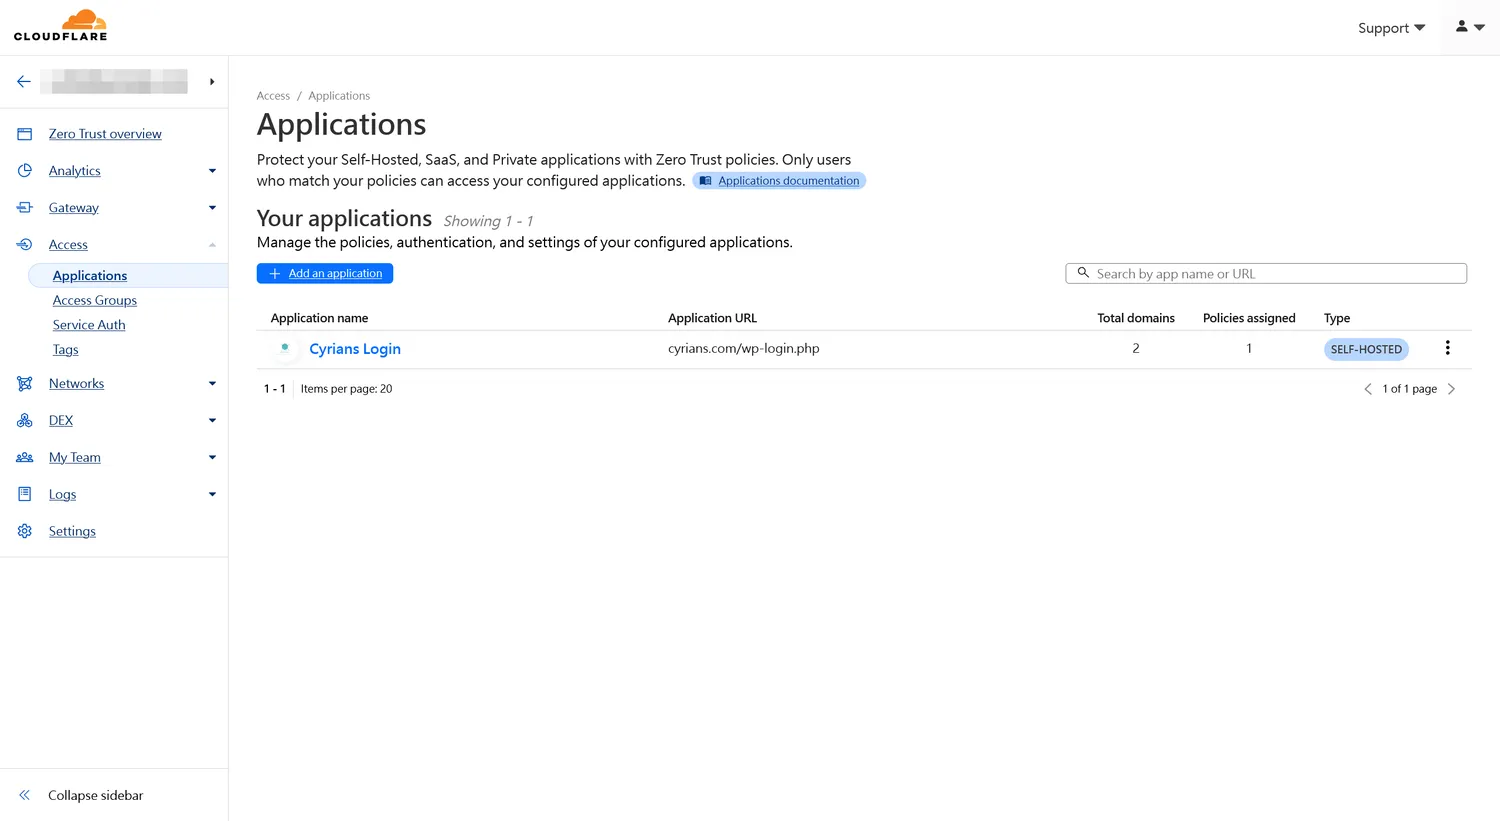
回到「Access」的「Applications」畫面,有剛剛增加的應用程序
我們這時候可以對進入/wp-login.php或是/wp-admin的頁面時,做一點畫面編輯
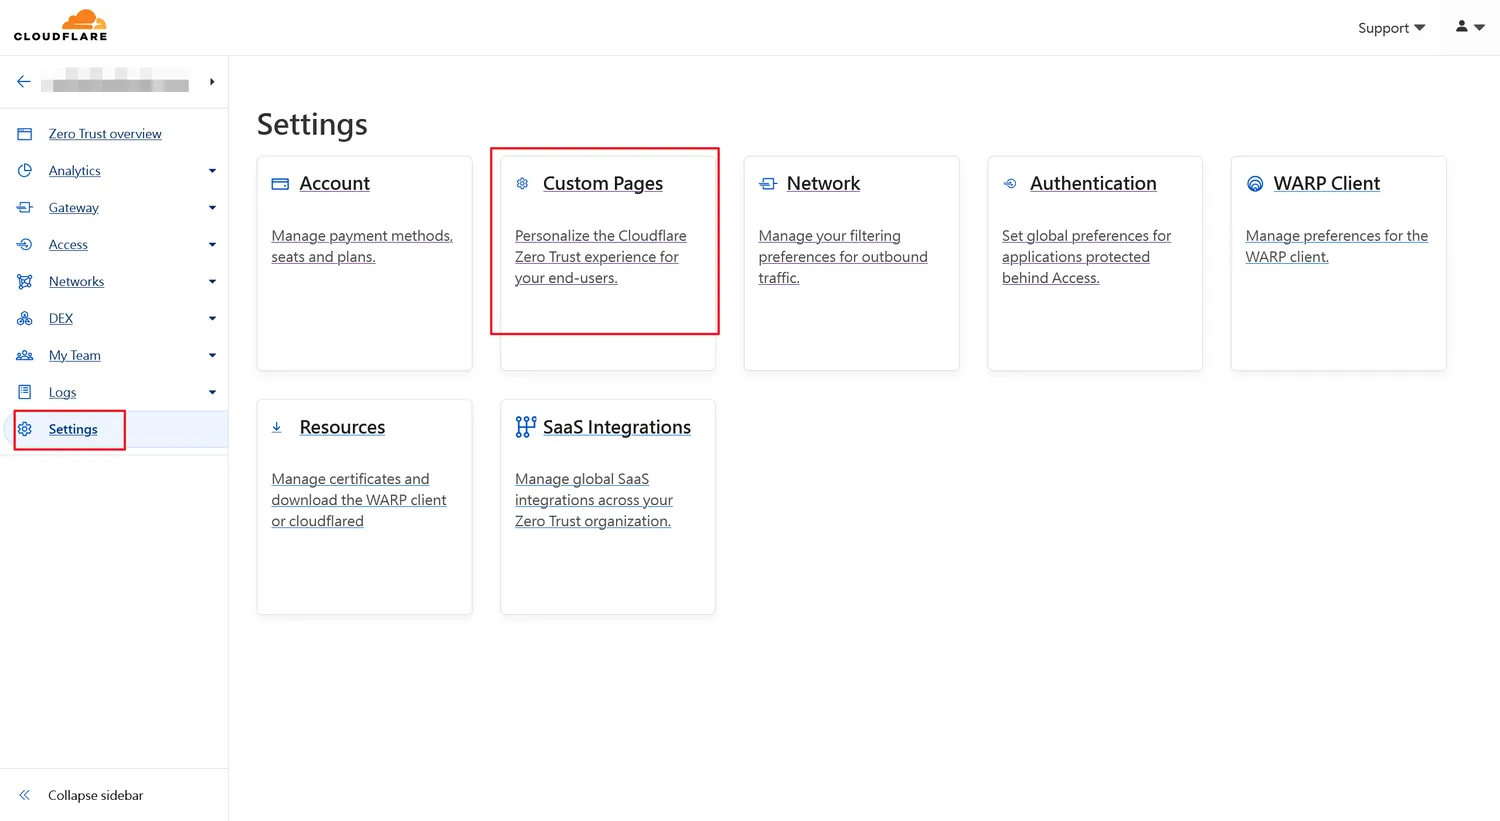
點選左側的「Settings」後,選擇Custom Pages

點選Login page的「Customize」按鈕
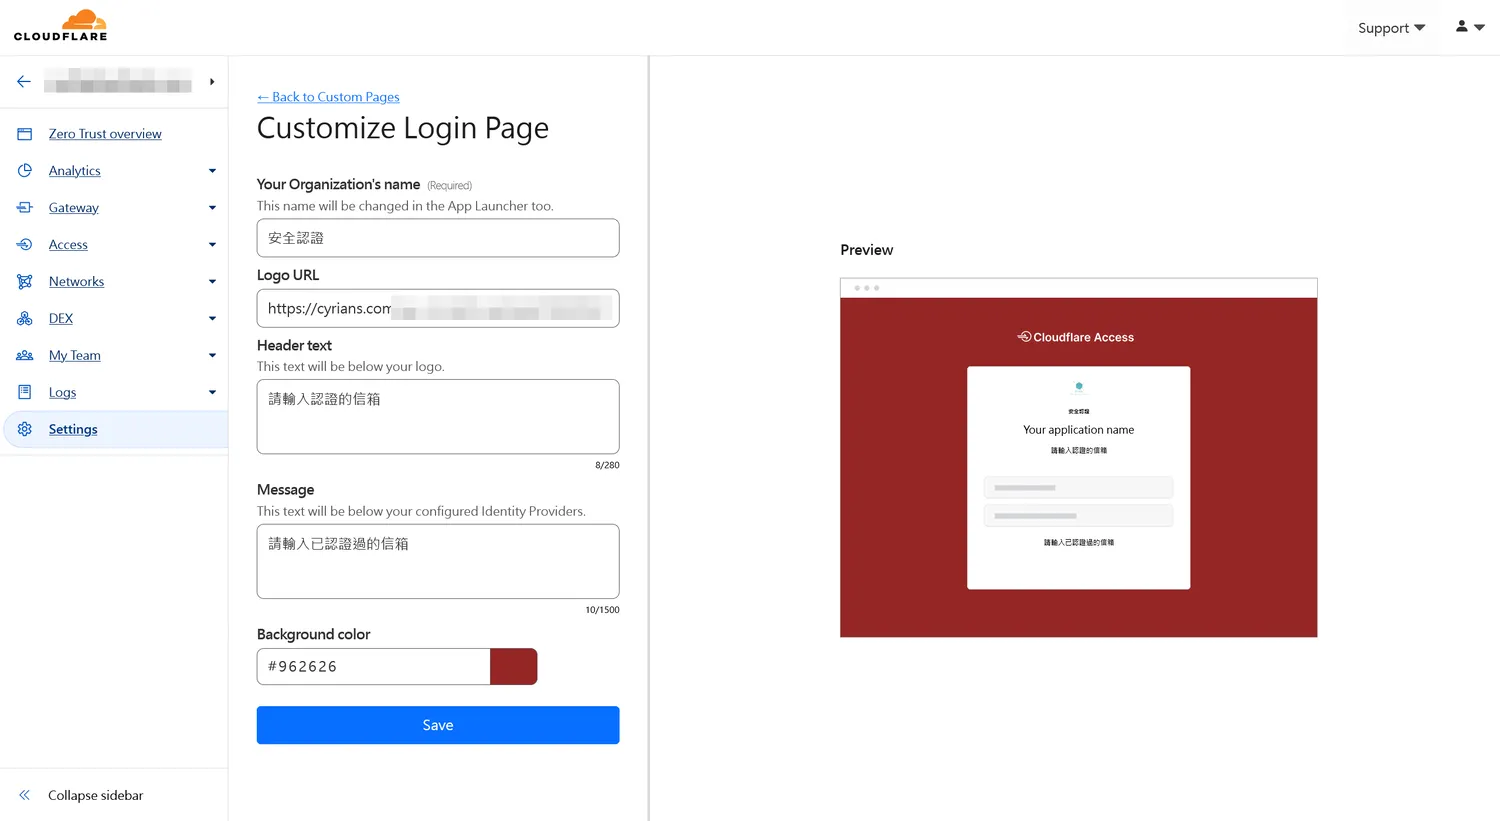
可以稍許編輯畫面的樣式
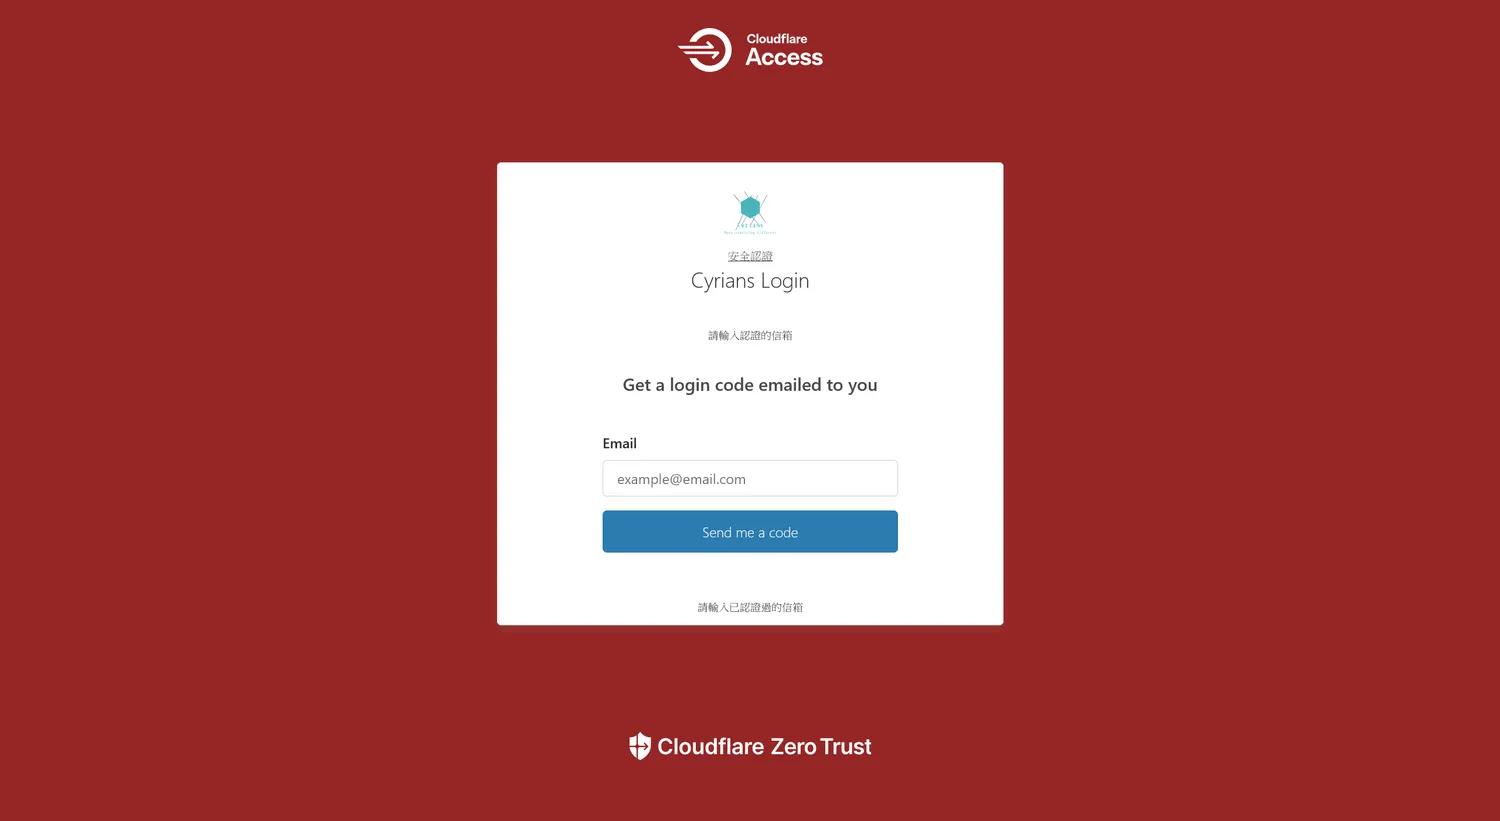
進入login.php或是wp-admin路徑時的畫面
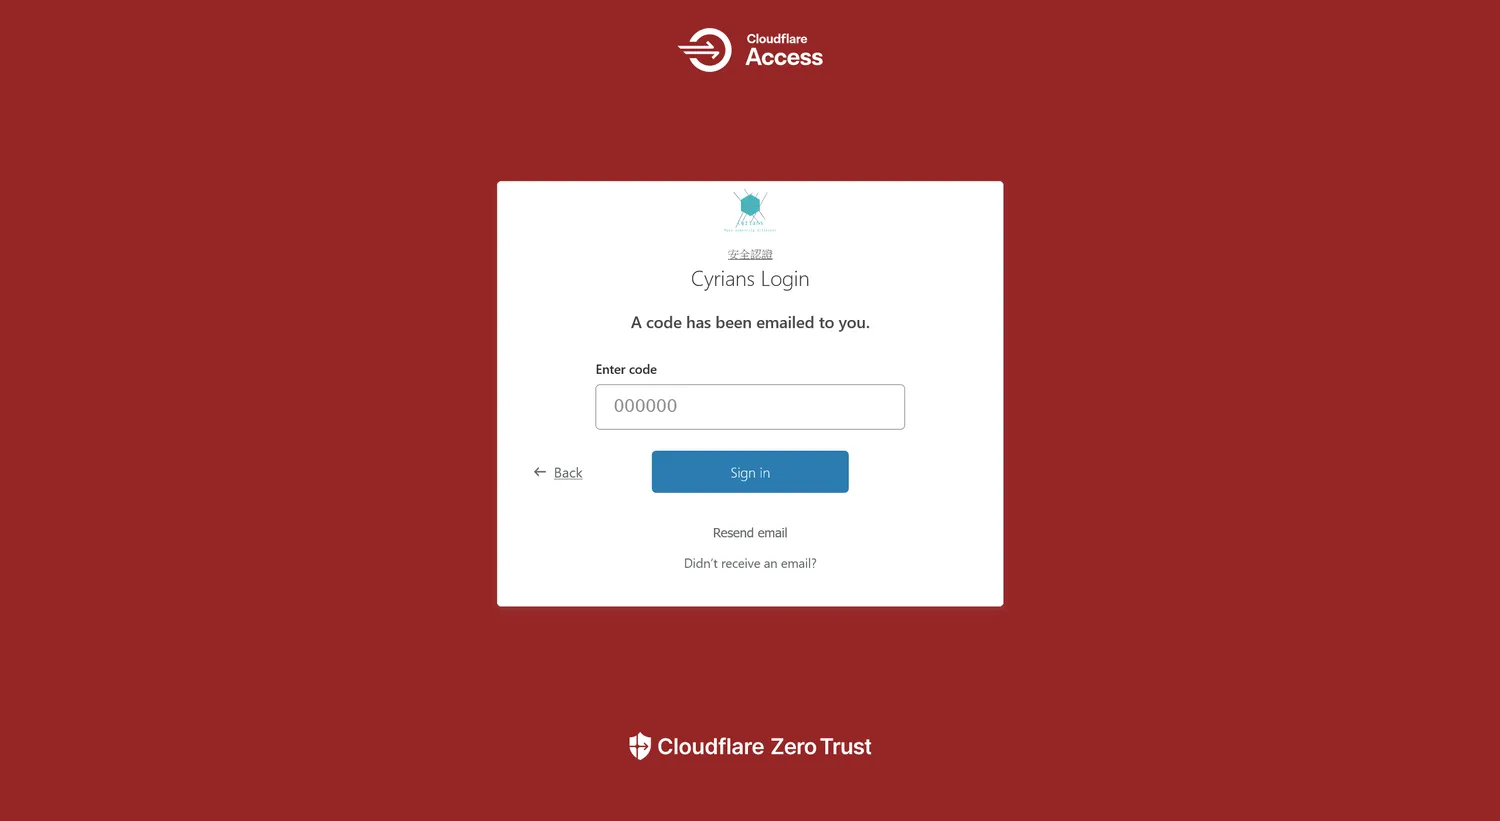
輸入設定收信的郵箱
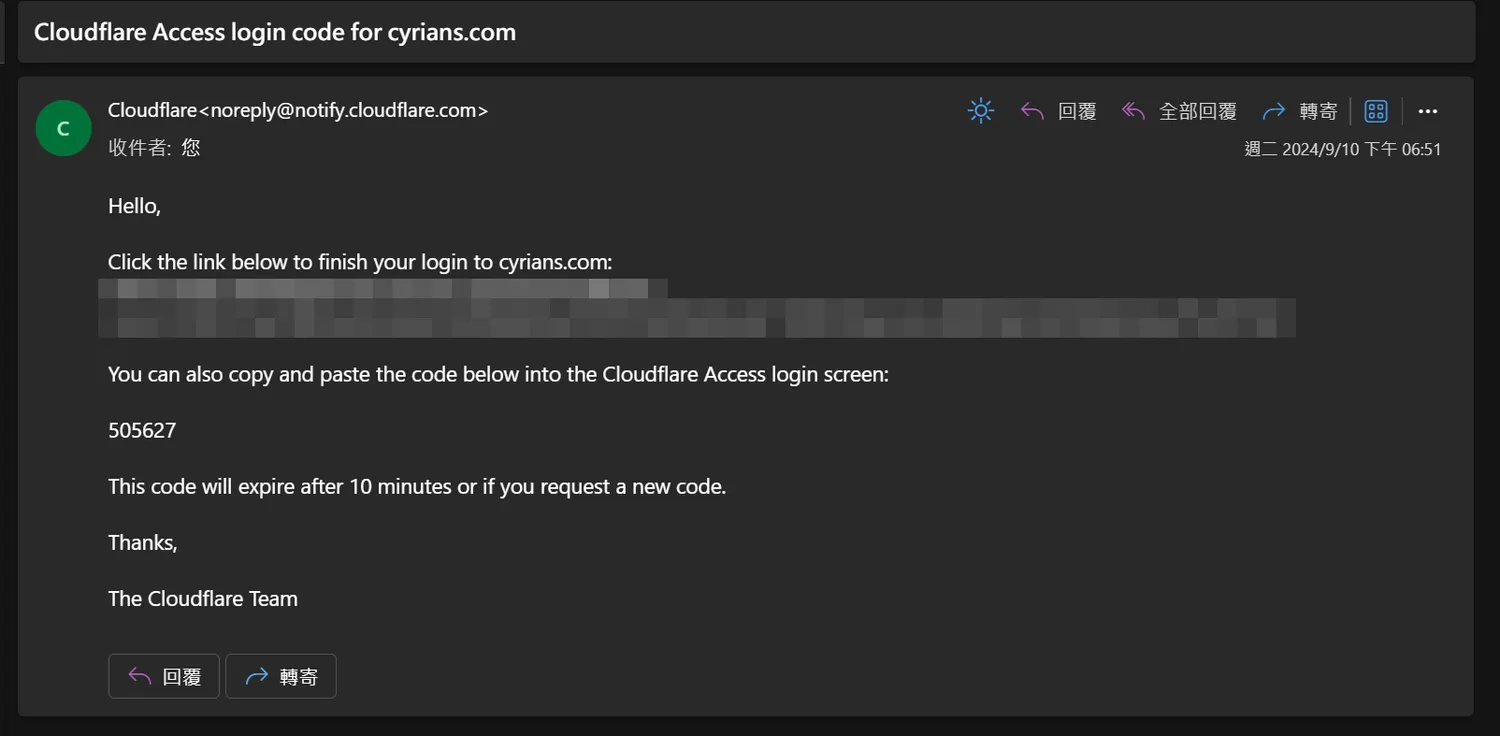
指定的信箱收件,輸入代碼或是點選連結
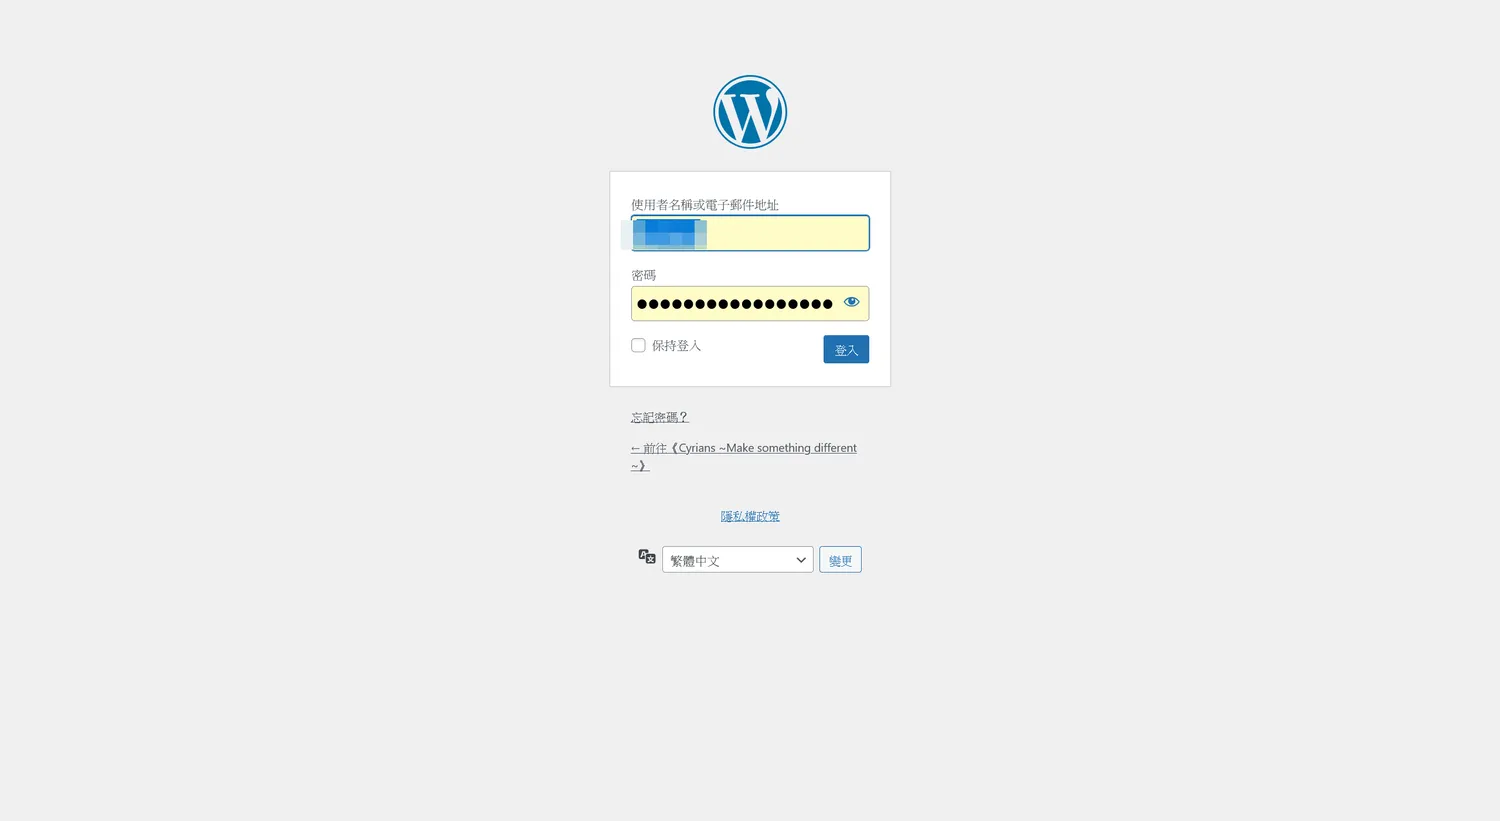
進入帳號密碼的登入畫面

進入後台畫面
這樣對wp-login.php和wp-admin的登入畫面做的防護,這樣也不用想破腦袋搞一些規則作限制
以上為[Cloudflare][WordPress]Cloudflare的更進階防護 – Zero Trust的介紹,希望能對你有幫助
